
In the digital age, the ability to connect through video calls is not just a convenience but a necessity. For iOS users, Safari is the gateway to these interactions, but enabling the webcam might not always be straightforward. Let’s check how to activate your webcam for Safari on your iOS device and you can participate in video calls with ease.
Understand iOS Privacy Settings
Before diving into Safari’s settings, it’s crucial to understand how iOS manages hardware features like the camera.
Apple places a high emphasis on user privacy, requiring apps to seek permission before accessing sensitive components.
To review or change access to your camera, navigate to Settings => Privacy & Security. Here, you can tap on Camera to see which apps have requested access and toggle permissions accordingly.
Also Read: Apple Vision Pro vs Meta Quest 3: Which VR headset is better?
Enable Camera Access in Settings
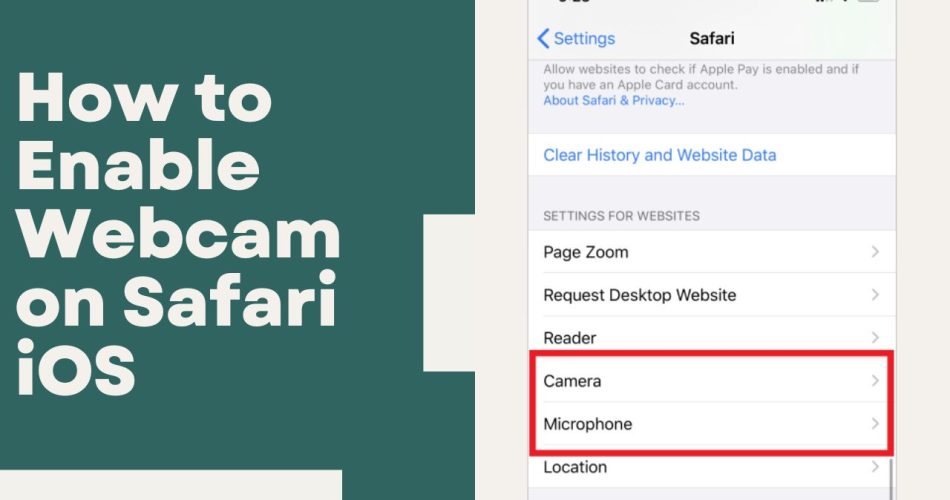
Next, enable full camera permissions for Safari in your iOS device’s settings:
- Open the Settings app
- Scroll down and tap “Safari”
- Under the “Camera” section, tap the switch next to “Allow Camera Access” to enable it
- Also enable microphone access if needed for sites needing both camera and sound
This allows Safari to access the camera when websites request access, without prompting each time.
Important: For increased security, you can instead set the Camera access dropdown to “Ask” – this prompts you to allow access whenever a new site requests the camera.
Allow Camera Access for Specific Sites
Alternatively, you can grant access on a per-website basis:
- Open Safari and navigate to the website needing camera access
- Tap the “aA” button on the left of the address bar
- Select “Website Settings”
- Under Camera or Microphone, tap the site and select “Allow”
This allows the camera for only this individual website, while keeping it disabled for other sites.
Check Indicator When Access Requested
When a website first requests camera access, confirm Safari has permission by checking for the indicator icon:
- iOS 14 and Newer: An orange or green dot appears on the top bar when the camera or microphone is actively in use
- Older iOS Versions: A message pops up at top when microphone or camera access is requested, which you can allow
If no indicator appears, double check the permission settings above to enable access.
Allow Access Prompt Each Time
Alternatively, you can have Safari ask for access every time a site requests the camera:
- In Safari’s Website Settings, set Camera and Microphone access to “Ask”
- When prompted to allow access, select “OK”
This gives you granular control each time a site requests access.
Reset Safari
If camera access is still not working, try resetting the Safari app:
- Open Settings and scroll down to Safari
- Scroll to the bottom and tap “Clear History and Website Data”
- Restart your iPhone or iPad
Resetting removes any cached data that may be preventing camera access.
Check Physical Camera
As a last resort, ensure the physical camera hardware itself works:
- Open the Camera app and try taking a photo
- Check Camera access in other apps like Facetime
- Ensure the camera lens is clean and nothing is obstructing it
If the camera works in other apps, it is an issue isolated to Safari’s permissions. But any physical damage would require servicing the device.